If you make a purchase using a shopping link on our site, we may earn a commission. Learn More
Comparing the Bambu Lab P1S vs the Prusa MK4
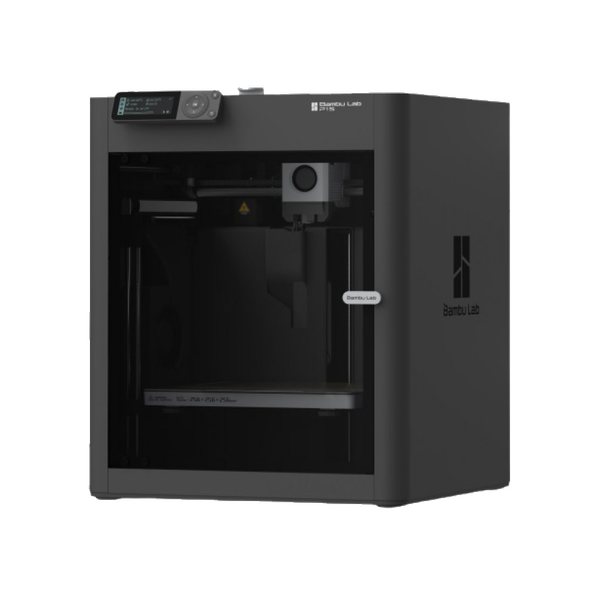
Bambu Lab P1S
(~10.25 x 10.25 x 10.25 in)
Vs.

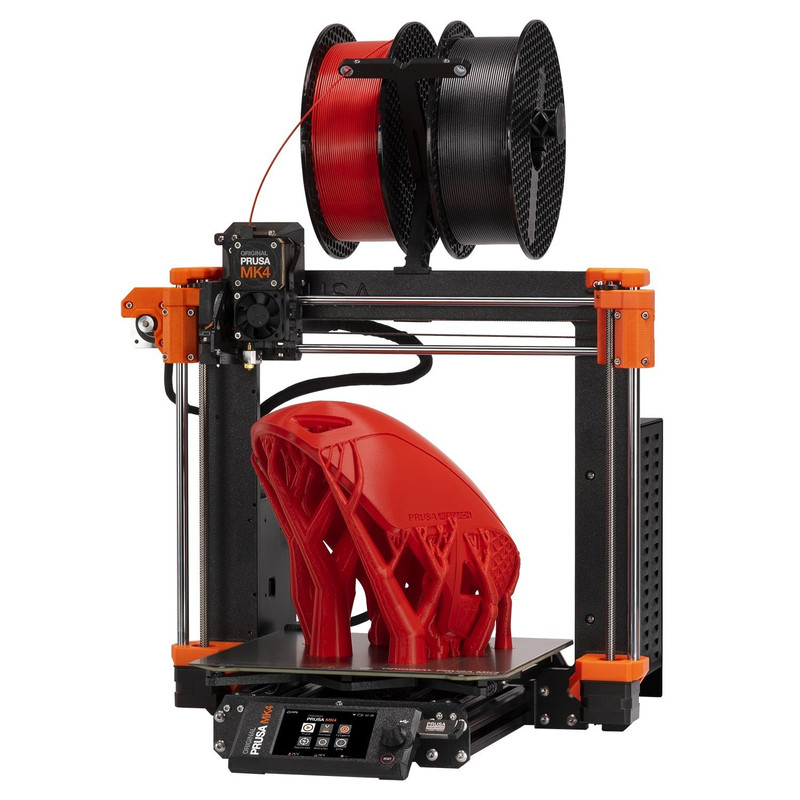
Prusa MK4
(~8.25 x 8.25 x 10 in)
In this article, we will take a look at the similarities and differences between the Prusa MK4 and the Bambu Lab P1S. Each of these premium consumer printers have features that offer a very similar base level of performance; however, there are some key differences that may make one or the other a better fit for your specific needs.

Bambu came to be well known by the 3D printing community in 2022 after successfully running a Kickstarter campaign. In July 2023, the P1S became the second printer in the P1 series, following the P1P by about 7 months. It debuted as an upgraded version of the P1P, which had already seen much success as a more budget-friendly premium printer option.
Prusa has been around for quite a bit longer than Bambu, having released their early model Prusa i3 printer in 2012. Since then, Prusa has iterated on the design, releasing MK2, MK3, and now MK4 versions of this original platform. The MK4 itself went on sale in March 2023, and was a long awaited and much needed upgrade to the MK3. Though the MK4 released slightly before the P1S, it is worth noting that Prusa took no fewer than 5 years from the first release of the MK3 to fully upgrade their flagship offering.
A thorough comparison of these two models is important due to the fact that they have similar pricing and capabilities along with a few very distinct feature differences. To start, we will discuss in detail the common features of the printers.
Similarities between the Bambu Lab P1S and Prusa MK4
This section will give a detailed breakdown of each similar aspect of the two printers.
Extruder and hot-end
Each printer uses an extruder design consisting of a direct drive filament system in tandem with an all metal hot-end. The hot-end design allows both printers to reach higher printing temperatures for compatibility with most standard filament materials. The P1S claims a maximum temperature of 300 ℃ while the MK4 heats up to 290 ℃. These temperatures are both more than sufficient for printing higher melting temperature materials like ABS; though the P1S has a distinctive advantage printing these materials due to its superior ambient temperature control. We will discuss this feature more in the differences section of this article.
Both the P1S and the MK4 have an extruder design that utilizes a flat ‘pancake’ motor with gears to keep the drive system’s mass concentrated closer to the extruders’ movement axes. This can help reduce vibrations that are created with quick movement and change of direction by the print heads. The extruders both use sensors to detect if filament runs out and pause the print to save it until you are able to reload it. Of course, the P1S and MK4 extruders do have some minor differences which we will discuss later, but in general they will perform very similarly to one another.

Print Speed
These premium printers can both utilize special programming and tuning algorithms to print at high speeds. At a hardware level, the P1S is capable of a max speed of 500 mm/s while the MK4 can achieve 600 mm/s. The raw speeds may seem to show that the MK4 is faster, but in reality the race is fairly even; this is due to the fact that programming and tuning are much more important factors influencing printing speed. The largest inhibitors to fast printing are the resonances created by rapid changes in print head speed and direction during printing. This vibration can transfer into the print layers and ruin accuracy, especially if a print has a lot of complex and thin geometry. Each printer actively handles these resonances or vibrations using an algorithm known as Input Shaping.
Input Shaping describes a printer’s ability to anticipate the vibrations caused by its own movement and actively account for them in the axis motors. In this way, abrupt changes in direction can be actively counteracted for their vibrations to avoid disruptions in printing accuracy. Both the P1S and MK4 are tuned from the manufacturer to handle this as part of their firmware. This is the main enabler for the fast, modern print speeds the two printers offer.
There is one other firmware calibration for these printers that allows high printing speed; the Pressure Advance algorithm is focused on the extrusion speed of the filament. This calibration predicts when adjustments in extrusion speed will be necessary to prevent over and under extrusion. For example, if the extruder is moving very quickly along long, straight, portions of the part, it can push more material through the nozzle to ensure that these long lines do not print thinly due to the excess speed. Alternatively, if the print head is slowing down to round corners on the print, it can slow extrusion down to ensure the edges of the print do not glob with excess material. Together, these calibrations allow both the P1S and MK4 to print very quickly and accurately.
Print Bed
Each printer utilizes a convenient print bed design. The heated beds are magnetic and can interface to a variety of spring steel build plates. The P1S ships with a textured PEI plate, while the MK4 comes with a smooth PEI plate; both manufacturers have additional plates/surfaces available for purchase if you have a preference. The plates are effective for first layer adhesion, and conveniently can be removed from the print bed to be cleaned or flexed to assist in safe retrieval of completed prints.

Automatic Bed Leveling
Using their own sensor systems, the P1S and MK4 both automatically level the bed and calibrate the first layer accordingly before each print. The printers use load cells to touch off to the bed in various areas, mapping out any minor changes in Z height that may exist in the build plate. They use this information to calculate a perfect Z height for the first layer of the print, paving the path for easy printing in each subsequent layer. Automatic Bed Leveling is a must have for premium printers, as it takes a lot of the guesswork and potentially tedious manual calibration out of the process of beginning a new print. The P1S and MK4 both can, for this reason, both claim the automatic “always perfect first layer” stated by their respective manufacturers.

Connectivity and Monitoring
Each manufacturer maintains software for remote print control and monitoring. The printers both have WiFi built-in to enable easy connections to this software.
The P1S works with the Bambu Studio software. It is both a monitoring software as well as a slicer, and can create gcode from uploaded models to be shared to the printer remotely. It also includes support for monitoring camera feeds during remote printing, which can be important for safety and peace of mind.
Prusa’s own remote connection software is called Prusa Connect. It is not on its own a slicer, but Prusa’s well-established PrusaSlicer can easily work with it to push your gcode to the printer. Like the Bambu software, it supports remote monitoring with camera feeds; however, the printer itself does not come with a camera like the P1S - more to come on that in the differences section.
Multi Material Printing Unit Compatibility
Each manufacturer has their own multi material printing add-on that is compatible with their respective printer. The add-ons themselves are slightly different but ultimately achieve the same functionality, allowing both the P1S and MK4 to create single prints that are made up of multiple filaments.
Bambu’s AMS (Automatic Material System) is a smart 4 spool holder that is capable of automatically switching between the filaments when needed during a print. The extruder will cut the current filament, load the next one, and then purge any old filament still in the hot-end assembly before resuming printing. Additionally, Bambu allows for this upgrade to be coordinated with additional units up to 3 times (with purchase of a control hub) to allow a total of 16 different filaments in printing.

Prusa’s MMU3 (Multi-Material Upgrade v3) achieves a similar goal. The Prusa system interfaces with 5 different spools. This is more than Bambu’s single AMS, but the MMU3 is not capable of combining with additional systems to increase its material capability count.

Each system provides slightly different benefits to its respective printer, but ultimately they accomplish the same purpose. The P1S and MK4 are both fully capable of handling multiple filament prints with these separately purchased upgrades.
Differences Between the Bambu Lab P1S and the Prusa MK4
While the MK4 and P1S are comparable in their basic printing capabilities, they have some major differences that will impact performance in various different scenarios. In this section we will break down each difference and what it might mean to you for specific printing needs.
Construction and Enclosure
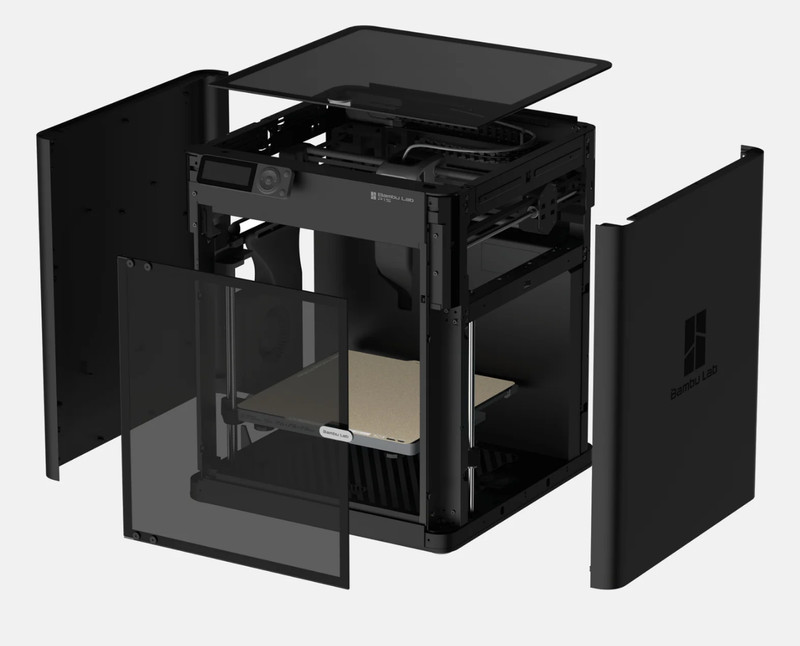
The two printers have vastly different constructions in their frames. The P1S has a 4 post welded frame that surrounds a fully enclosed build area, while the MK4 has a rigid 2 post box frame that is located directly over the center of an open build area. Each design is well optimized to be rigid and avoid unnecessary vibration, however, the enclosed build area of the P1S offers far more environmental control and protection than the open design on the MK4.
Out of the box, the P1S has a fully enclosed build space; enclosures are available for purchase for the MK4, but at a stock level it is completely open to the space around it. This gives the P1S an advantage in several use cases, the most important being the need to control the ambient temperature around the print. In the P1S enclosure, an auxiliary part cooling fan is included to actively control temperatures as the print progresses. As mentioned earlier in the article, this is important for higher melting temperature filaments so that they cool evenly and do not warp the print as the material thermally contracts at a different rate than the layers below it. Additionally, the P1S includes a carbon filter for airflow out of the enclosure, protecting your workspace from unpleasant smells and fumes. The integrated enclosure design helps to mitigate noise from printing as well.
Motion System
The MK4 utilizes a traditional motion system design known as the Standard Cartesian or bedslinger layout. In this configuration, the extruder itself only moves along the X axis, while the print bed controls Y axis positioning. The X axis assembly shifts up away from the bed in the Z direction after completing each layer. The P1S, on the other hand, uses the more modern CoreXY design, where the extruder is able to move in both the X and Y axes together, while the build plate shifts down away from it in Z as each layer is completed. CoreXY is typically able to provide speed benefits over Standard Cartesian systems, however, it doesn’t seem to make too much of a difference against Prusa’s well refined bedslinger design. For servicing, CoreXY does offer a small advantage; the P1S is capable of a semi-automatic tension adjustment for the X and Y axis belts, with tensioners conveniently located on the back of the printer. The MK4 on the other hand will require an entirely manual process to refit and adjust belt tension if needed, Some belts will also be difficult to access, such as the Y axis belt located below the print bed.
Build Volume and Physical Size
Each printer has a different max printable volume and overall size, listed below:
- Bambu P1S - Max. Build Volume: 256 × 256 × 256 mm, Printer Size: 389 × 389 × 458 mm
- Prusa MK4 - Max. Build Volume: 250 x 210 x 220 mm, Printer Size: 500 x 550 x 400 mm
The MK4 takes up more table space than the P1S, while offering less printable space. This is largely due to the bedslinger motion system of the MK4; it is much less space efficient than CoreXY. The P1S is a little bit taller however, so if you are trying to fit your printer into a confined space you may want to consider these differences. The P1S will also be able to print slightly larger parts than the MK4, which again can be important to specific use cases.
Extruder
The extruders of both of these models are very similar, but have some small differences that could be important for some functions. The P1S uses a PTFE tube to feed into the metal hot-end; this design is intended to help prevent filament from melting too early in the extruder. However, the MK4 takes a different approach with a metal tube, relying on heat sinking to prevent this. The metal tube may offer more long term durability than PTFE, which can be damaged over long periods of time by heat and abrasion. The MK4’s design also allows for a more simplified process to swap nozzles on the extruder, which can be a benefit if you like to print many different materials with different diameter or metal nozzles.

The MK4 extruder also has an integrated part cooling fan to better control ambient part cooling. This isn’t really an advantage for the MK4, as the P1S accomplishes this result more effectively with its enclosure and integrated part cooling fan.
The P1S also uses a cable chain to ensure cables running to the extruder do not droop and interfere with cooling or printing. While it is nice for peace of mind, this is not a very crucial upgrade, as proper cable routing and management should prevent these issues on its own.
Print Quality
Each printer offers a high quality of printing, however the MK4 may have a very slight advantage over the P1S. The MK4 uses higher precision stepper motors with a smaller step angle, allowing them to achieve double the precision of a standard motor. The result of this is not extremely noticeable on prints, but they will eliminate some small vertical line artifacts that can appear on a print’s surface. This feature may be important to you if you need to print high precision or tight fit parts, but otherwise, either printer will produce very high quality prints.
Display and Controls
The P1S and MK4 have a significantly different level of display functionality. The MK4 uses a larger color LCD to communicate information on the printer. The LCD has a high enough resolution that it can effectively show 3D print thumbnails as a 2D image as well as other useful information about print status. Additionally, the control panel on the MK4 uses a light bar with RGB LEDs to communicate status from a distance and has a USB port allowing for manual loading of gcode with a flash drive. The screen’s navigation is a bit dated, using a dial that can click as opposed to arrow buttons or a touch screen, but otherwise it is a very functional and appealing UI.
The P1S, on the other hand, uses a much more dated monochromatic LCD. While it is perfectly adequate for browsing filenames and reading printer data in text form, it is a barebones execution for printers in this market segment. While the display navigation includes convenient arrow buttons, the screen is also quite a bit smaller than the MK4’s. Additionally, the P1S is compatible with a micro-SD card for manual gcode loading. If you plan to be manually configuring your prints fairly often, you may want to consider the UI and ease of use features of the MK4 as a serious advantage over the P1S.


Camera
The P1S includes a 720p camera and LED lighting mounted in the print enclosure. This is a nice perk if you do not want to have to put money or time into upgrades or changes to your printer after setup. However, the camera itself has a low framerate and is really only useful for remote monitoring; if you want to make print timelapse videos, you will likely need to purchase a higher quality camera. The MK4 on the other hand does not come with any cameras or existing mounts for them - camera setups for Prusa Connect will need to be entirely DIY at your own expense.

Upgradability
While the P1S is a very complete printer kit that may not need much in the way of upgrades, it is not very upgradable by the end user. The aforementioned AMS and build plates are available from Bambu, but other than that, there is not much else customizable for this printer.
The MK4, on the other hand, has a whole host of upgrades available for purchase from Prusa. A heavily configurable printing enclosure is available, with options for a lock, LEDs, upgraded filtration systems, and even a fire suppression system (available in the EU only). The enclosure must be purchased separately however, and it starts at $349; this is a huge budget consideration considering that the P1S comes standard with an enclosure. Additionally, Prusa is very receptive to community feedback and makes part models and code publicly available to the community. As a result, there are many unofficial upgrades that can be sought out from Prusa tinkerers.

Assembly
The P1S and MK4 have vastly different approaches to assembly and setup. A brand new P1S takes only a short time to be set up and start running your very first print. This out-of-the-box functionality is a key point for Bambu, and getting a P1S running well should be relatively simple and quick. Prusa, however, has an opposite approach to printer assembly - the MK4 kit will take about 8 hours to completely build. The printer can be purchased fully assembled, however, it will cost about $300 more than the disassembled kit. This business model is geared towards printing enthusiasts who enjoy learning about their printer and don’t mind putting in the time to build it themselves. If you want something quick and easy, the MK4 is not a great choice over the P1S; if you would rather dive into the assembly and have an experience building your printer, the MK4 is a much better option for this.
Community and Resources
Bambu doesn’t have the community built up that Prusa has fostered over the last 10 years. Prusa has a philosophy of transparency and actively engages in a positive relationship with customers through forums and discussions. Programs and 3D design files for their printers are publicly available for customers to adapt to their own use cases or improve upon. Additionally, the Prusa forum is a treasure trove of information on troubleshooting, mods, models, and ongoing discussions about 3D printing and Prusa’s products. This community is a major strength of the Prusa brand and should be considered if you hope to draw on these resources after purchasing your printer.
Bambu is not completely lacking in the community department - they do have their own forum and rapidly growing user community. The forum has many Q&A threads and detailed guides for Bambu printer users. However, unlike Prusa, this is a primarily user based operation, and Bambu does not participate or share quite as much material as their open source minded competitor.
Pricing
The two printers have a very similar starting price: the MK4 kit is around $100 more than the P1S. This is not the entire story for the MK4 pricing though; it can end up costing you quite a bit more if you purchase it pre-assembled, almost $400 more in this case. Additionally, Prusa is only able to ship from their headquarters in the Czech Republic, resulting in high shipping costs to North America specifically. Bambu, though based in China, is able to ship from a hub in the US as well. It is a bit surprising to see that the MK4 has a higher price of entry than the P1S, considering that the P1S already comes with an advanced enclosure at its base price. A fully assembled MK4 with a Prusa enclosure (which you will have to partially assemble yourself) shipped to the US will likely cost upwards of $1550, a full $850 more than the already enclosed and assembled P1S.
Should You Choose the Bambu Lab P1S or the Prusa MK4?
The P1S and MK4 are each very capable and reliable premium consumer printers. At a base level, they perform similarly in terms of quality, print speed, and ease of use features. The differences between the two may or may not be important to you depending on your personal needs.
The P1S is a hands off experience and will be printing efficiently for you right out of the box. It has several premium features built in, such as the enclosure with cooling control and air filtration, a monitoring camera, and a compact design capable of automatic calibration for fast and high quality printing. This is hard to beat its price point, and will serve you very well in this segment of the printer market. If you want an enclosed, effective, low-maintenance, high performing machine, the Bambu P1S should definitely be your pick.
As for the MK4, it suffers quite a bit when pricing is factored into the equation. It is hard to justify the significantly higher costs of the MK4 when the only major improvement it has over the P1S is the display on the printer. An argument could be made that the accessibility of the MK4 is a major strength; the easily swappable nozzles, discounted user assembled kit, wealth of open source design material, and general upgradability certainly appeal to many tinkerers. A portion of the price also likely needs to be justified by the stock you personally place in the reliability and longevity of the Prusa brand. If you want the purchase of your printer to be a long lived experience of learning and community, and aren’t specifically planning to print with higher temperature materials that require more ambient control, the MK4 may be worth that extra money to you.
Click here to view the Bambu Lab P1S on the Bambu Lab website.
Click here to view the Prusa MK4 on Prusa3d.com.
You can find a side-by-side comparison of the specifications for these two printers in the table below: