FDM 3D Printer Component Overview

In this guide, we’ll cover each of the major parts of a 3D printer, explain its purpose, and show you how all of the parts work together to produce 3D printed objects.
We will be focusing on fused deposition modeling, or FDM, 3D printers. This is the most common type of consumer 3D printer.

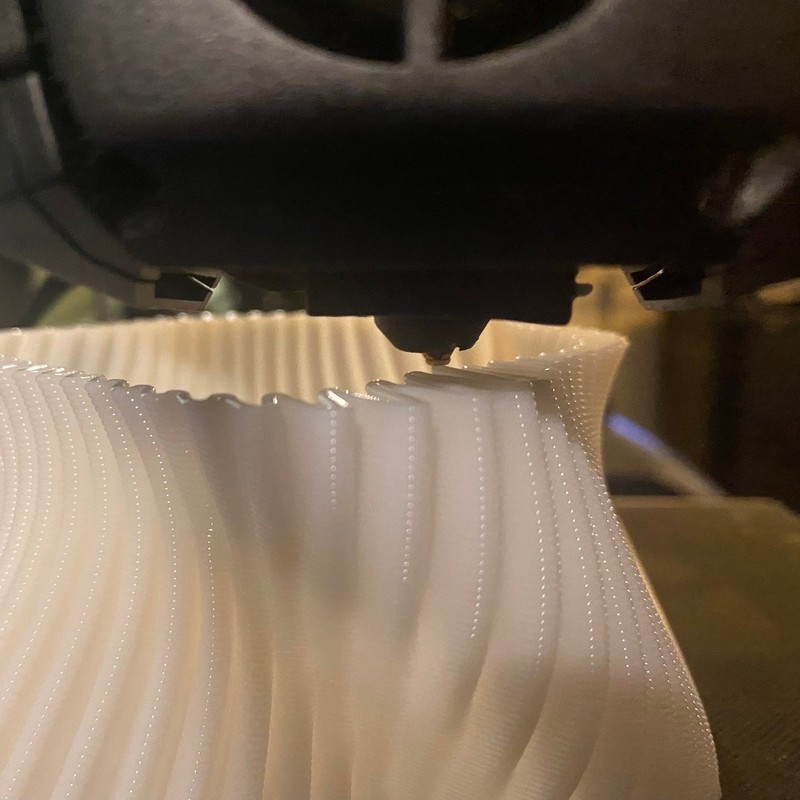
FDM printers melt plastic and dispense it with a nozzle to precisely build an object one layer at a time. Think of how a soft-serve ice cream machine works—FDM 3D prints are similar, but less tasty.
Filament
Before covering the parts of the 3D printer itself, let’s start with the raw material used by the printer to form parts. Plastic is by far the most common material used by standard FDM printers, and there are several common varieties used, such as PLA, ABS, and PETG. There are some other materials used with an FDM 3D printer, such as nylon and TPU, but they are less common than the plastics mentioned previously.
Each type of plastic has different qualities that make it better suited for certain applications. For example, if you were printing a model for use outdoors, you would want to choose a material that is designed to withstand hot and cold temperatures.
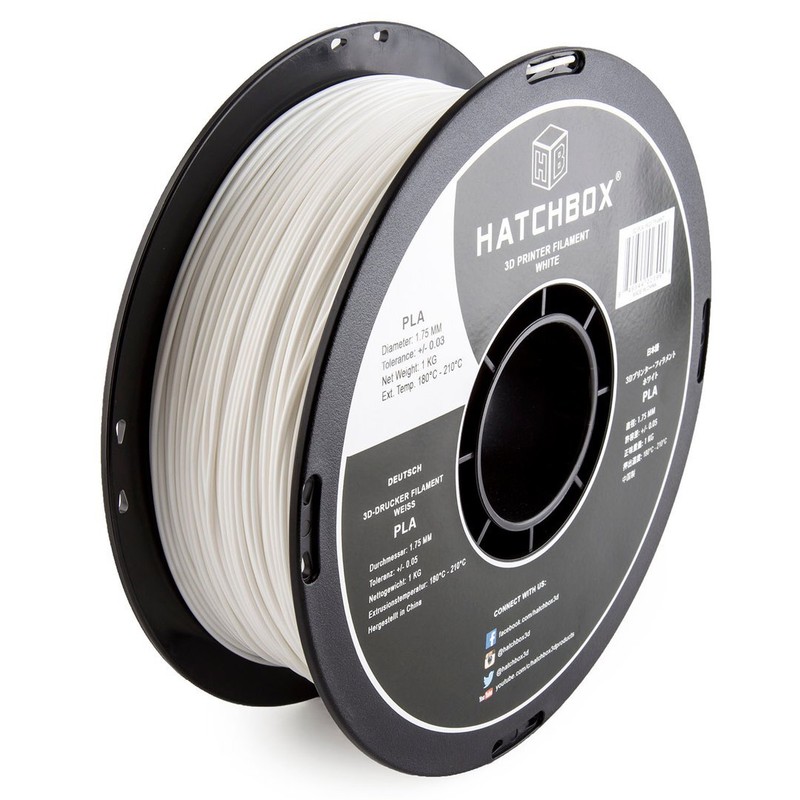
Regardless of the material, it is typically packaged in the form of filament, which is a long, thin strand of material wrapped around a spool. Filament is normally stiff but bendable, and comes in two common sizes, with 1.75mm diameter filament being the most common. You can buy different sized spools, but a standard spool is 1 kilogram (2.2 pounds).
Filament also comes in different colors, and the color of the filament is usually a close match to the color of the final 3D printed model. Some materials can slightly change color when printed, but unlike an inkjet printer, a FDM 3D printer cannot mix colors or add any coloring to the printed material. Many hobbyists end up with a large collection of filament to allow them to print in a variety of colors.
Next, we’ll explain each main part of a 3D printer, beginning with the parts that directly touch the filament during printing.
Hotend and Nozzle
The hotend melts the filament so it can be pushed out, or extruded, through the nozzle. The extruder, described in the next section, is connected to the hotend either directly or through a flexible Bowden tube and feeds filament into the hotend. The filament passes through the hotend and is heated to its melting temperature just before reaching the nozzle. As more filament is pushed in from the top of the hotend, the melted filament is forced out of the nozzle.
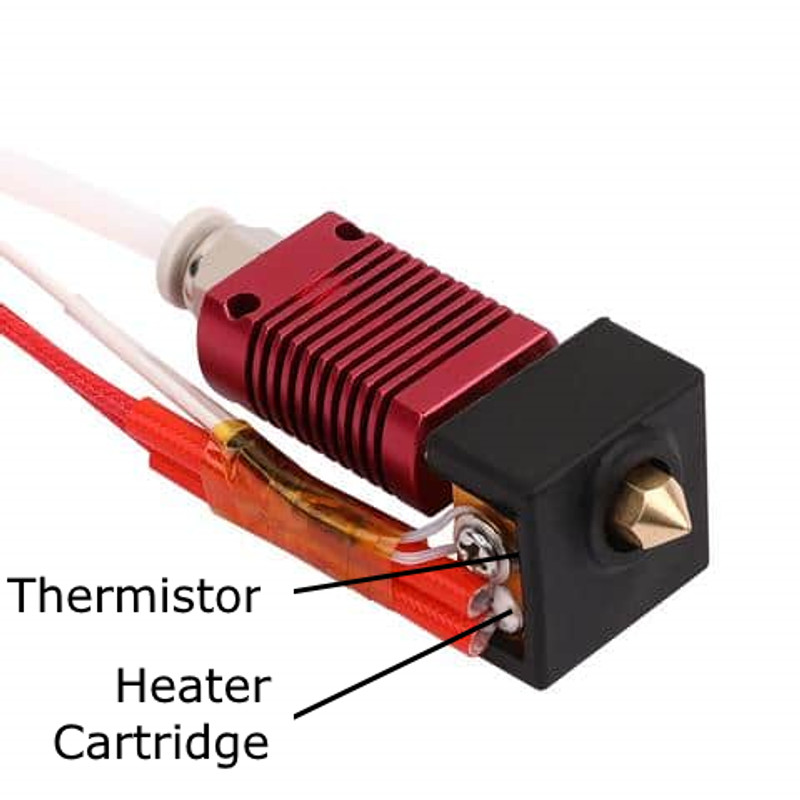
There are many different hot end designs, but all hotends include the same key components. They consist of a cold side, which is a metal or PTFE tube that guides the filament into the hotend, and a heat block where the filament is melted and extruded through the nozzle.
The hotend also includes an electric heater and thermistor, which are embedded in the heat block and precisely control the temperature of the hotend to melt the filament. For every material type and hotend design, there is an ideal temperature that the hotend should be heated to. The electronics in the hotend ensure it doesn’t get too hot or too cold for successful printing.
The nozzle screws into the heat block at the bottom of the extruder. It tapers down to a tip with a small hole where the melted filament will be extruded to form the 3D printed model. Nozzles are one part of the 3D printer that you are likely to need to replace after many hours of printing, so most hotend designs make the nozzle easily removable.
Nozzles are also available in different sizes. A larger nozzle will allow you to print larger objects more quickly, but can’t produce high-resolution details as well as a smaller nozzle. Think about drawing a picture with a marker instead of a pen—the marker is less precise, but can color an entire page much faster than the pen. A standard nozzle size for an FDM 3D printer is 0.4mm, where this number describes the diameter of the hole in the tip of the nozzle.
Extruder
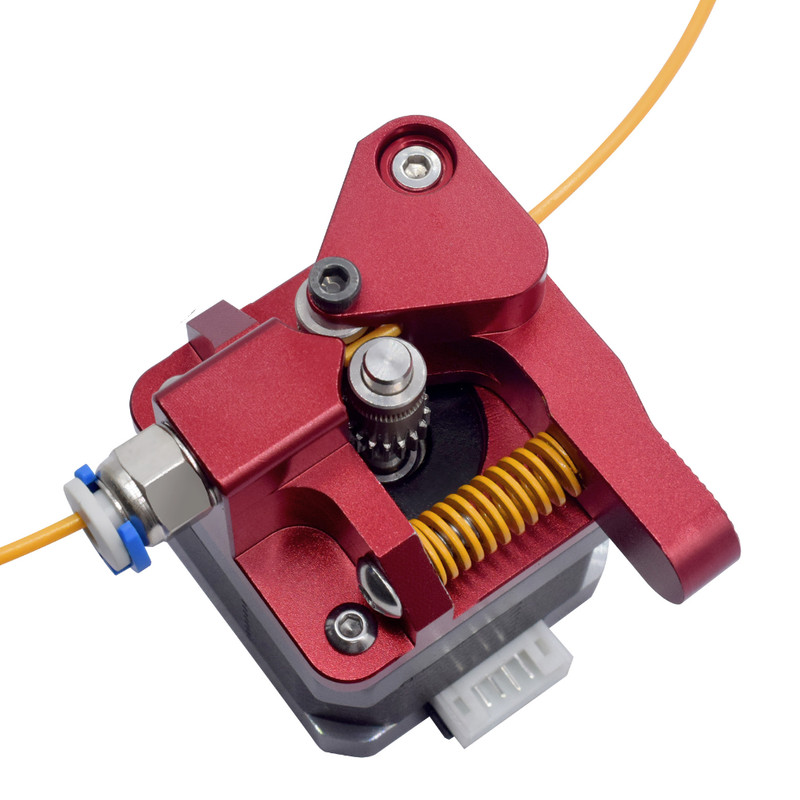
The extruder is responsible for feeding filament into the 3D printer. It is powered by a motor, and includes a mechanical system that grips the filament and allows the motor to push it through the printer and out through the nozzle. One important aspect of the extruder is that it must be able to feed a precise amount of filament at a precise speed to ensure accurate and successful 3D prints.
There are two common types of extruders:
- Direct Drive extruders are positioned such that the hot end (described in the next section) is directly attached to the extruder. This means that as soon as filament leaves the extruder, it is immediately entering the hot end to be melted and pushed out through the nozzle. Most users feel that direct drive extruders are the superior extruder design, but one downside is that they add weight and bulk to the moving X carriage on the 3D printer, which requires the mechanical systems of the printer to be designed to handle the added weight.
- Bowden extruders are connected to the hot end with a hollow, flexible tube known as a Bowden tube. When filament exits the extruder, it travels through the tube until it reaches the hot end. Bowden extruders have the advantage of removing the weight and bulk of the extruder from the X carriage of the 3D printer, but this comes at the cost of being less reliable and less capable of handling flexible filament, such as TPU.
Print Bed
The print bed is a flat piece of glass, metal, or similar material that is used as a base for the 3D printer to print onto. When the printing process begins, the nozzle will be positioned very close to the surface of the print bed to print the first layer of the model. Once the first layer is complete, the nozzle moves slightly farther away from the bed and the second layer is printed on top of the first layer. The size of the print bed dictates two of the maximum dimensions (length and width) that a given 3D printer is capable of printing.
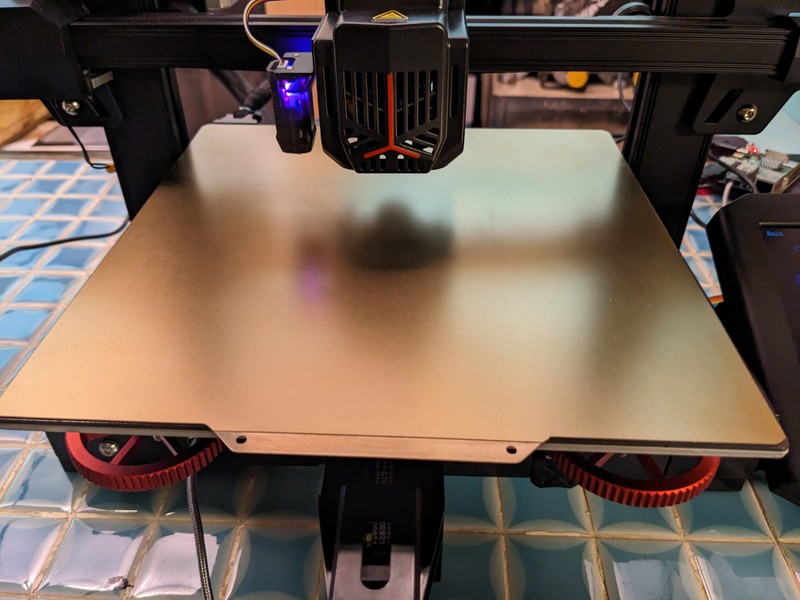
Because the first layer of the 3D print is printed onto the bed, it is important for the print bed to have good layer adhesion, meaning that the extruded plastic must stick to the print bed while printing is in progress. Most print beds include a heater so the bed can be heated during printing, which improves layer adhesion. Some print beds also have a coarse texture to improve adhesion. Of course, you need to be able to remove the 3D print once it’s complete, so the bed surface can’t stick to the print too strongly, either.
It’s also important for the print bed to be as level as possible during printing. To get successful and high-quality prints, the nozzle needs to be the exact same distance from the bed for the entire first layer. For this reason, every FDM 3D printer has a way to adjust the precise height and position of the bed—a process known as bed leveling. While this is a manual process on some machines, many newer 3D printers include an automatic bed leveling feature. This feature typically uses an electronic sensor to level the bed automatically, simplifying the setup process.
X, Y, and Z Axis

The motion system of the 3D printer is responsible for moving the hotend and nozzle around the print area. There are a few common mechanical designs, but almost all of them consist of three related parts. These parts are described from the perspective of you facing the 3D printer.
- X Axis, which handles left and right movement. The hotend and nozzle are often attached to a carriage on the X axis.
- Y Axis, which handles the forward and backward movement. On many 3D printers, the Y axis moves the print bed back and forth.
- Z Axis, which handles the up and down movement. On most 3D printers, the Z axis moves the X axis up and down, but on some printers, the print bed moves up and down instead.
The X, Y, and Z axis each use a motor to control the movemement along the axis. For the X and Y axis, the motor typically drives a rubber belt that the X carriage or print bed is attached to. Although some 3D printers also use a rubber belt for the Z axis, it’s more common for the Z axis to use a metal leadscrew, which is slower than the rubber belt but provides more lifting strength. Some printers use two Z motors, each driving a separate leadscrew, to provide greater stability when moving the hotend up and down.
Each axis also typically includes an endstop, which is an electronic switch that lets the 3D printer know when it has reached the maximum movement distance along the axis. The only exception is printers with automatic bed leveling—for those, the Z axis will use a sensor probe mounted near the hotend in place of its endstop.
Mainboard
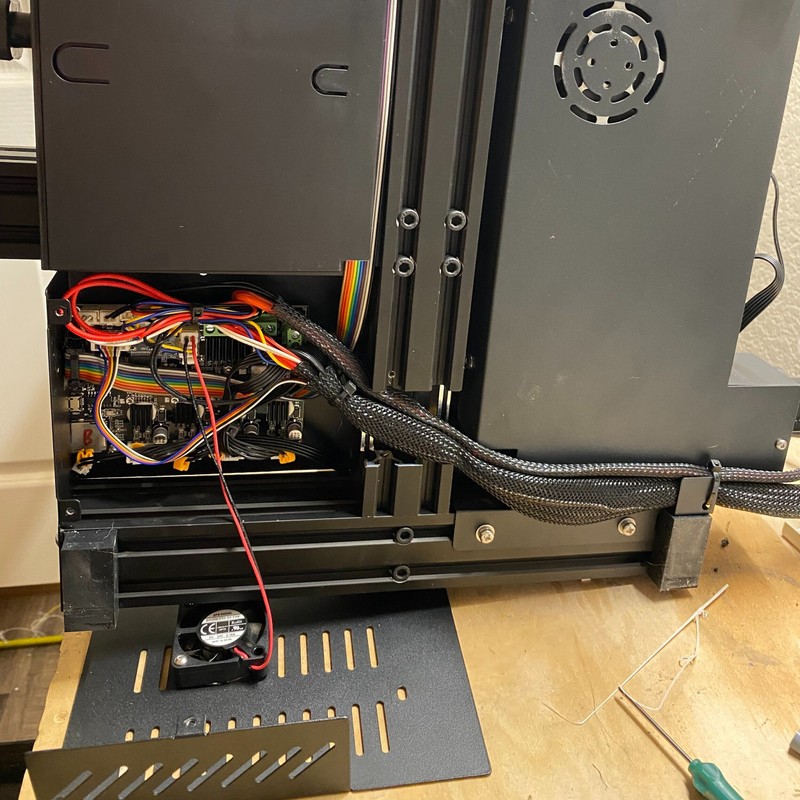
The mainboard is the electronic board that controls the functions of the 3D printer. It routes power from the power supply to the motors, print bed, and heater, and includes motor drivers to precisely control the motors on the X, Y, and Z axis, as well as the extruder.
The processor on the mainboard reads a series of printer commands, known as gcode, and translates them to printer movements. For example, a gcode command might instruct the printer to move a certain distance along the X axis. Another gcode command might tell the printer to extrude filament. These commands are generated by software on your computer and transferred to the mainboard through either a USB cable or SD card. The mainboard receives the commands and controls the printer electronics accordingly.
User Interface
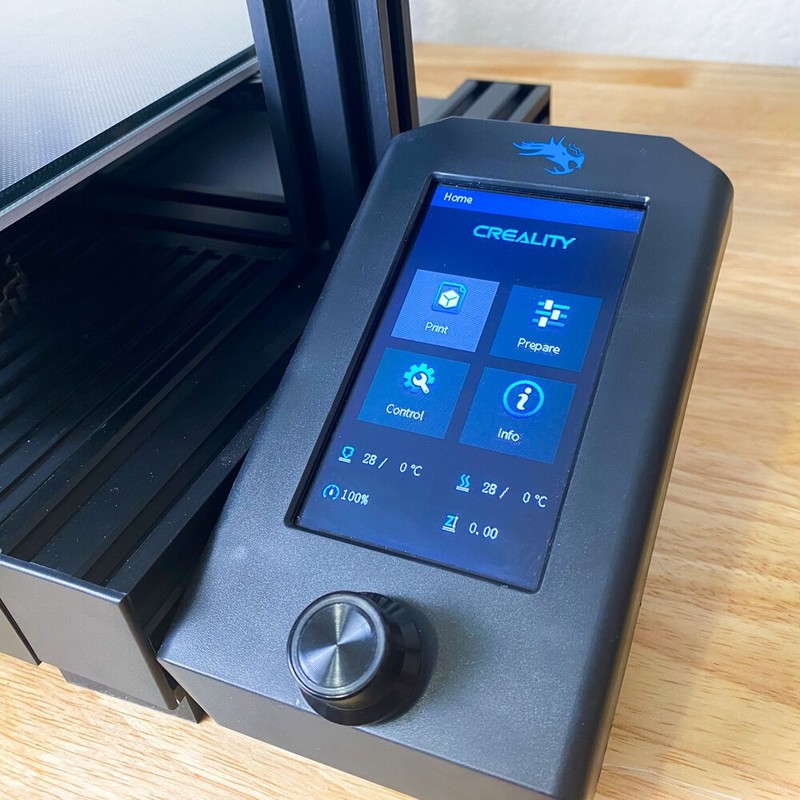
The user interface for the 3D printer typically consists of a screen and a knob or set of buttons to allow you to configure the 3D printer. Some printers include a touchscreen controller. You can use the interface to heat the printer, manually extrude plastic, and move the hot end and nozzle to different positions.
Most 3D printers include an SD card slot where you can insert a microSD card with printable .gcode files for printing. After inserting the card, you can use the user interface to select the desired file from a menu to begin printing. A few 3D printers include Wi-Fi to allow you to load .gcode files onto the printer wirelessly, but this is an uncommon feature.
During the printing process, the user interface allows you to monitor the status of the print, giving you a progress bar and an estimated completion time. You can also pause or stop the print, although pausing is not recommended and can result in print failures.
Conclusion
Although there are many different 3D printers available and multiple designs for each of the components in a printer, every FDM 3D printer includes the major components described on this page. You can follow the links in the sections above to learn more about each component, as well as our recommendations for which features to pay attention to in each component when comparing different 3D printers.