If you make a purchase using a shopping link on our site, we may earn a commission. Learn More
Ender 3 V3 vs Creality K1C

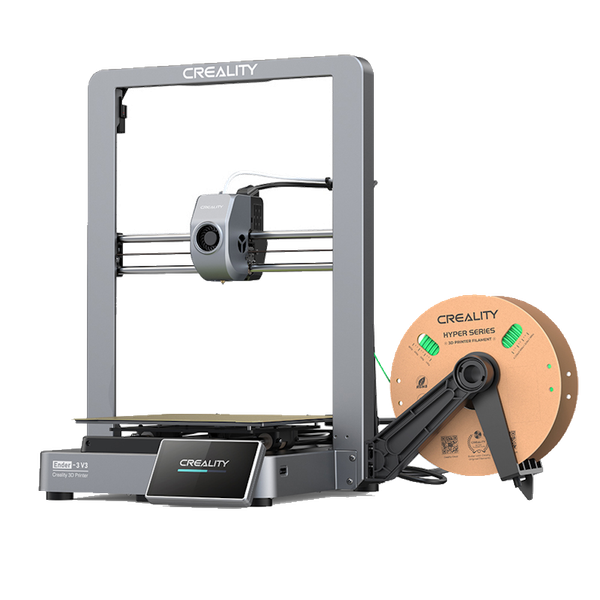
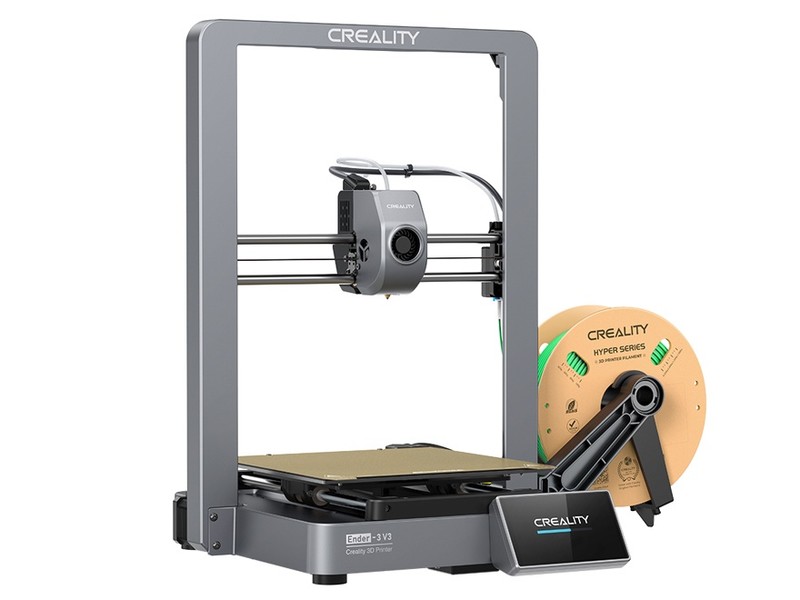
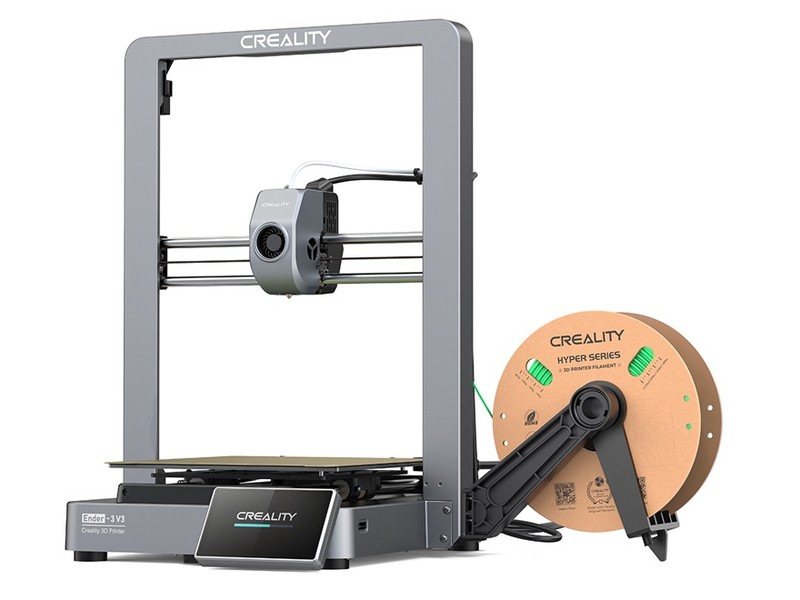
Creality Ender 3 V3
(~8.75 x 8.75 x 10 in)
Vs.

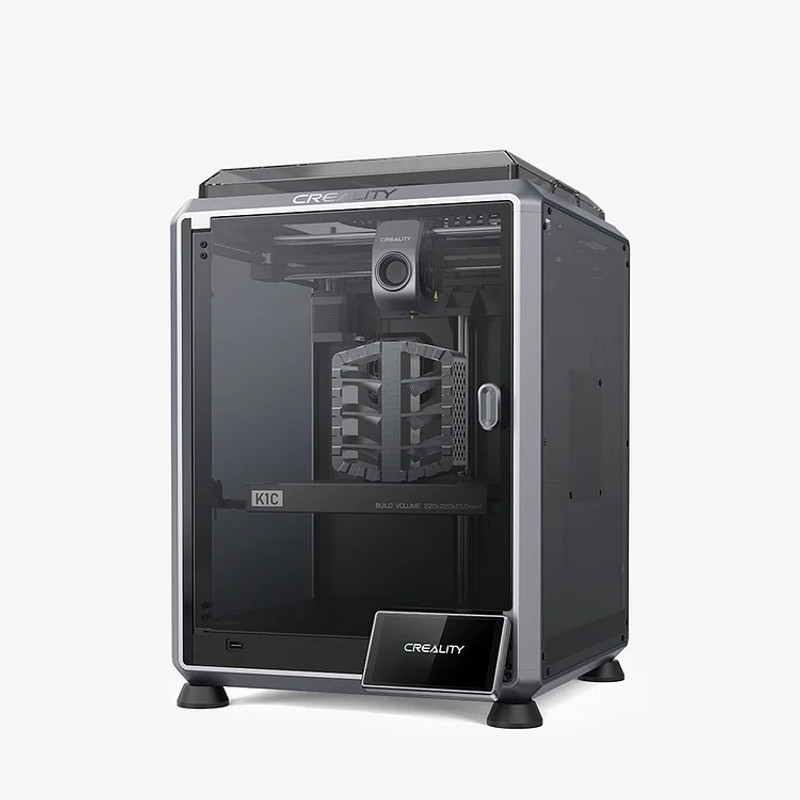
Creality K1C
(~8.75 x 8.75 x 10 in)
The Ender 3 V3 is Creality’s answer to the budget high-speed 3D printing race, implementing a rigid motion system to keep up with some of the fastest 3D printers on the market. The new CoreXZ design takes inspiration from Creality’s K1 series 3D printers, making some noticeable improvements in some areas, though it does not play a major role in making the V3 a capable machine.
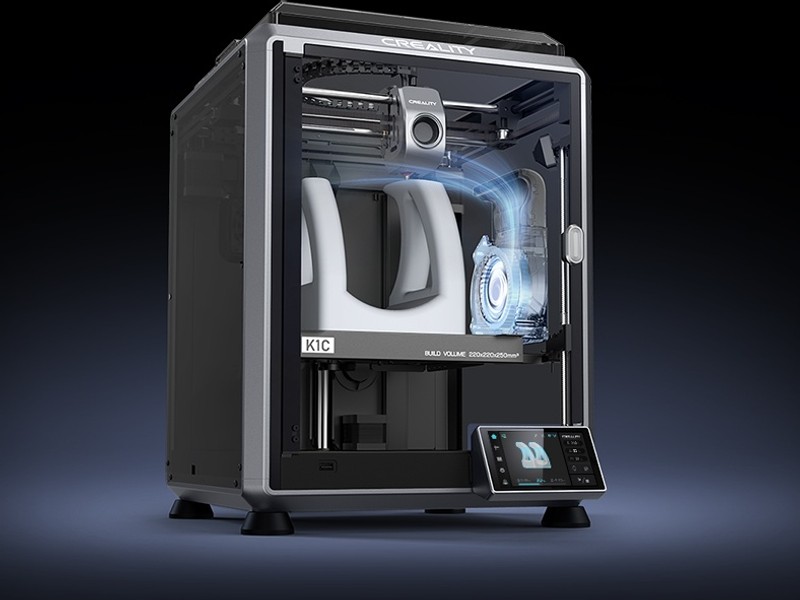
The Creality K1C is an upgraded version of the popular K1 printer, addressing many of the issues users had with the previous model while adding a variety of nice features that will make the K1C a more appealing option in the high-end 3D printing market.
In this article, we will be comparing both of these machines, going over their similarities and differences in order to help you decide which Creality 3D printer is right for you.
Differences Between the Ender 3 V3 and the Creality K1C
While there are a lot of similarities between these two machines, we will begin with the differences as there are some major differences that may sway your decision.
Motion System and Frame Design
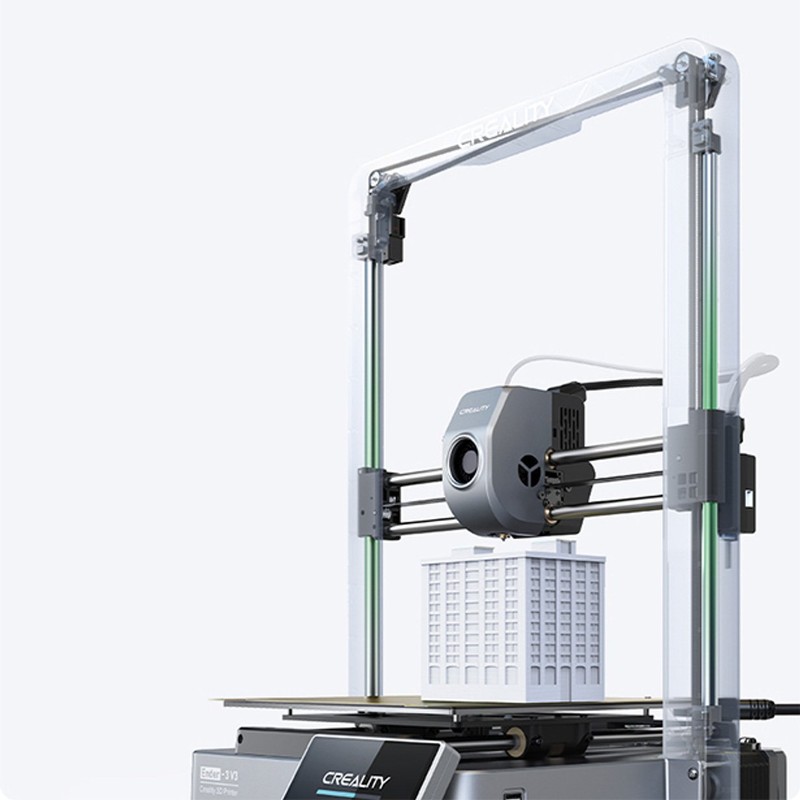
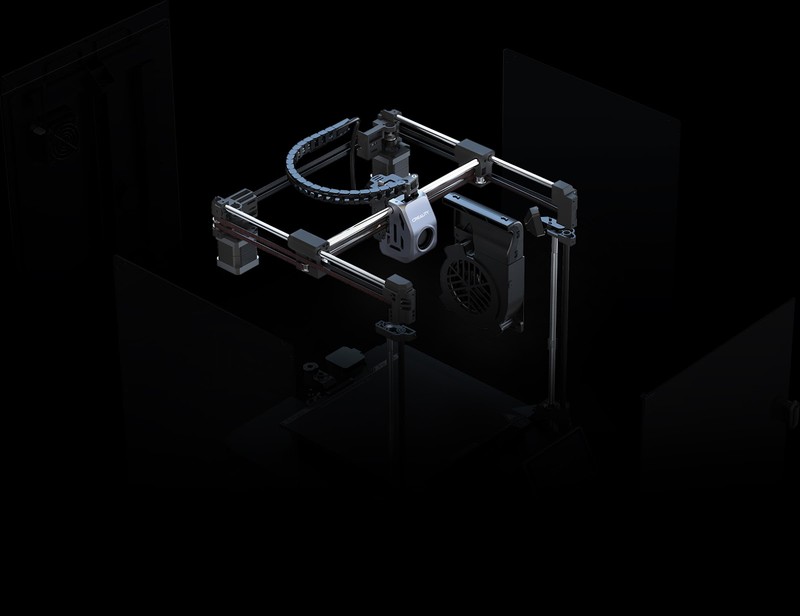
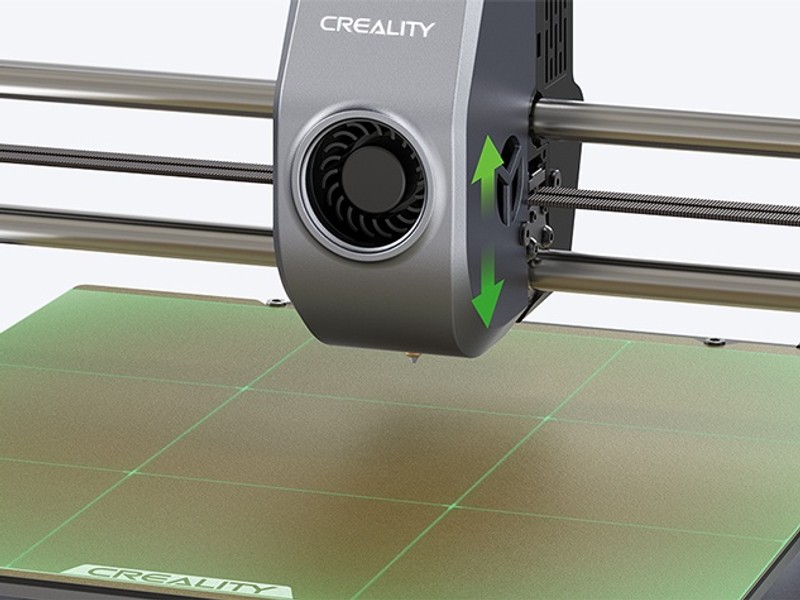
The first and most obvious difference between the Ender 3 V3 and the K1C is the motion system. The Ender 3 V3 uses the same I3-style frame as the Enders before it, an open frame with the Y-axis moving along the base while the X and Z axes are controlled by the gantry, often referred to as a “bedslinger” design due to the moving bed. The frame itself is a two-piece die-cast aluminum, giving it more rigidity than the traditional v-slot extrusions found on older Ender generations.
The Ender 3 V3 uses linear rods across all planes of motion, with a novel CoreXZ motion system. The CoreXZ system uses timing belts to connect the X and Z axes together. Both the X and Z axes are controlled by two high-torque stepper motors at the base of the machine. Removing the X-axis stepper motor from the gantry makes it much lighter, reducing vibrations at higher speeds, and making the machine capable of faster movements along the Z-axis. We have yet to find an actual use for the Z-axis improvements from the CoreXZ design, though the use of linear rods as opposed to lead screws will lead to more precise Z-axis movements and less Z-banding over the lifespan of this printer. The CoreXZ design is similar to the CoreXY design found on the K1 and K1C, though the choice to move from the Y-axis to the Z-axis with this type of system seems trivial.
The Creality K1C sticks to the tried-and-true CoreXY motion system that was popularized by Bambu Lab’s X1 and P1P series printers. This motion system uses linear rods across the X-axis and Y-axis, with both being controlled by two stepper motors in sync, while the Z-axis is controlled by three lead screws. We much prefer this CoreXY design over the V3’s CoreXZ design, as the improvements made to the X and Y axes can easily be spotted in the speed and quality that the machine is capable of achieving. Along with faster movements of the print head, the CoreXY motion system keeps your prints stable on the print bed, with the only movement being the Z-axis moving the print down when a new layer begins. This will lead to increased part stability and reduce the chances of taller prints wobbling or falling over due to excessive Y-axis movements.
The K1C is also built from a one-piece die-cast aluminum frame, giving the whole machine a nice rigidity that is very much needed to combat the vibrations made by this motion system.
Enclosure and Air Filter
The second most obvious difference between these printers is the presence of an enclosure. The Creality K1C comes with a prebuilt enclosure around the frame, using acrylic side pieces, a plastic top cover, and a glass door. This enclosure allows you to print a variety of materials that would normally warp or lift off of the print bed in an open environment. The K1C is also equipped with an active carbon filter to help reduce the emission of harmful debris and smells created when printing most engineering-grade materials. The inclusion of an enclosure also makes the K1C safer to operate around children and pets, as no heated or moving parts are exposed.

The Ender 3 V3 uses the all-to-familiar open-frame design that many I3-style 3D printers follow. This has no impact on the print quality or capabilities of hobby-grade materials, though the machine is not compatible with most engineering-grade filaments.
Filament Compatability
The inclusion of an enclosure and carbon filter on the K1C make it compatible with just about every material the average or experienced 3D printer user could want. The enclosure is capable of maintaining an ambient temperature of around 40°C. This makes ASA, polycarbonate, and carbon fiber blends all possible on this machine. When printing PLA or PETG, we recommend leaving the door to the machine open and removing the top cover to allow for more airflow. A heated enclosure when printing these materials may lead to clogs or jams in the machine.
If you plan on printing with a wide variety of materials, the K1C is the most versatile between the two.
Print Surface
The Ender 3 V3 comes stock with a flexible textured PEI print surface. This is our preferred print surface as it provides great bed adhesion and is one of the easiest beds when it comes to part removal. Once the bed cools down, simply flex the surface to pop your prints right off. This print surface is found on many modern 3D printers and for good reason.
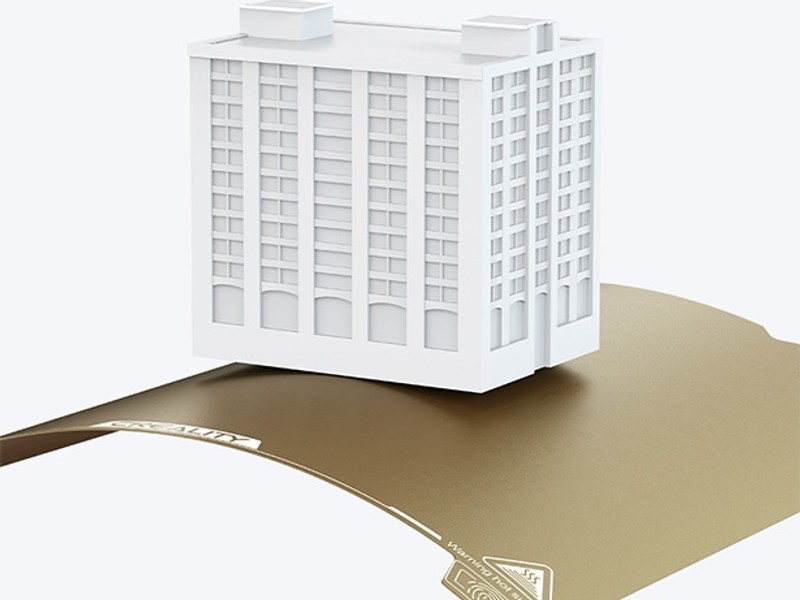
The Creality K1C comes with a smooth PEI print surface. This type of print surface requires additional adhesive in order to get prints to stick reliably. We recommend using a glue stick when using smooth PEI print surfaces. The smooth surface also makes variations in the Z-offset more apparent in prints, while a textured surface would normally hide these differences in height across the bed.
We recommend regularly cleaning both of these print surfaces with isopropyl alcohol to keep dust or oils from your hands from building up on the print surface and reducing adhesion. Additional print surfaces can be purchased fromCreality’s website, including a textured PEI print surface for the K1C.
Physical Size
The Creality K1C takes up quite a bit of desk space, having to house the entire motion system inside of an enclosure. This results in the machine sitting at 428 x 428 x 567 mm(16.8” x 16.8” x 22.3”) in total size. The Ender 3 V3 is noticeably smaller in comparison, sitting at 358 x 374 x 498 mm (14” x 14.7” x 19.6”) in total size. Keep in mind that additional space will be needed in the front and back of the Ender 3 V3 for the Y-axis movements of the bed. This effectively makes both 3D printers take up the same amount of space, though the K1C is more efficient in its space usage.
Assembly
Creality has been slowly moving its newer generation of 3D printers towards a more user-friendly experience when it comes to assembly. You will find that both of these 3D printers are much easier to assemble than previous generations. The Ender 3 V3 comes mostly pre-assembled, with the gantry and the base being the only two pieces in the box. You will need to attach the gantry to the base with a few screws before connecting all of the stepper motor and sensor plugs. The display attaches to the front of the base and a single cable runs from the mainboard to the print head. Slide your spool holder in place on the side of the printer and you are ready to begin startup calibrations. Assembly of the V3 shouldn’t take you more than 10-15 minutes and you will be starting your first print in about 25 minutes.
There isn’t much to assemble with the Creality K1C. This is more of an unboxing experience. The printer comes pre-assembled with some additional screws and protective pieces attached to keep everything safe during shipping. After removing the protective packaging and safety screws, you will need to install the screen, spool holder, and filter cover before powering up the printer and beginning calibrations. The unboxing and setup time should take around 5 minutes and you should be printing your first print in under 15 minutes.
Both of these machines are very easy to assemble, even for a beginner. We have to give the win here to the K1C though, as no real assembly is required for this printer.
AI Camera
The Creality K1C comes with a built-in AI camera that offers a slew of additional features when using the Creality Cloud app, including:
- Spaghetti Detection to alert you if your print comes loose or begins printing in mid-air, pausing the print for you to inspect
- Foreign Object Detection to alert you if any items are spotted on the print bed before a print job is initiated
- Time-lapse Filming to create time-lapses of your prints
- Remote Monitoring of your prints from your phone using the Creality Connect
These camera features are great for users new and experienced, as they can save you from unexpected print failures and keep you from wasting filament.

The Ender 3 V3 does not come with an AI camera. Creality does offer an aftermarket camera add-on that will let you monitor your prints and create time-lapses, though this is an added expense and you will be missing out on the additional AI features that come with the K1C camera.
Part Cooling
The Ender 3 V3 comes with two part cooling fans on the print head, one in the front and one in the back. This provides full 360° coverage of the printed filament when cooling, improving performance on overhangs and high-speed prints.
The Creality K1C has a single part cooling fan on the print head that is run through a duct, shooting air in a crescent at the printed part. This alone provides ok overhang performance though is not nearly as thorough as the dual-fan design on the V3. To make up for this, the K1C has an additional part cooling fan mounted on the left-hand side of the enclosure. This high-powered fan will blast cool air towards the nozzle and provide exceptional cooling when printing steep overhangs or fast-moving prints. While much louder than the V3’s cooling fans, the K1C will provide more efficient cooling than the V3 thanks to the larger cooling fan in the enclosure.
Similarities Between the Ender 3 V3 and Creality K1C
While these two printers may look very different from each other, they both share many of Creality’s best components in order to stay relevant in today’s 3D printing market.
Print Speed
Both the Ender 3 V3 and the Creality K1C are rated with a maximum print speed of 600 mm/s. This speed is expected for most CoreXY machines and is impressive to find on a bedslinger. While most users will opt to use a print speed of around 300 mm/s for consistent print quality, these higher speeds will definitely lead to shorter print times. Both printers are rated with a 10,000 mm/s maximum acceleration speed, meaning less time is needed for the movements of the print head during printing. This is especially noticeable when printing multiple files at the same time, as the print head will travel between the models much faster than other 3D printers.
You can expect very similar performance when it comes to print speed between these two printers, though the K1C is more reliable at higher speeds when printing tall objects as the stationary bed keeps prints stable.
Build Volume
Both the Ender 3 V3 and the Creality K1C use the same build volume of 220 x 220 x 250 mm (8.75” x 8.75” x 10”). This is a sizable print volume that has become the average for many 3D printers and should be suitable for the majority of print jobs. You may be pressed for space when it comes to printing large files, where you may end up having to print them in multiple pieces to fit on the bed.
Extruder and Hotend
Both the Ender 3 V3 and the Creality K1C have an identical all-metal hotend with a high-flow rate for high-speed 3D printing. The all-metal design reduces the chances of filaments clogging or jamming and the removal of any plastic parts or PTFE tubing means part deterioration at high temperatures is eliminated. These hotends are capable of printing at 300°C, making them suitable for most materials, though only the K1C can take advantage of them as the Ender 3 V3 lacks an enclosure and air filter.
Both machines use a dual-gear direct drive extruder, providing excellent grip on the material. This extruder is specifically designed to keep up with the required flow rate necessary for high-speed 3D printing. A Bowden tube is used to help guide the filament to the extruder, making printing with flexible materials, such as TPU, much easier.
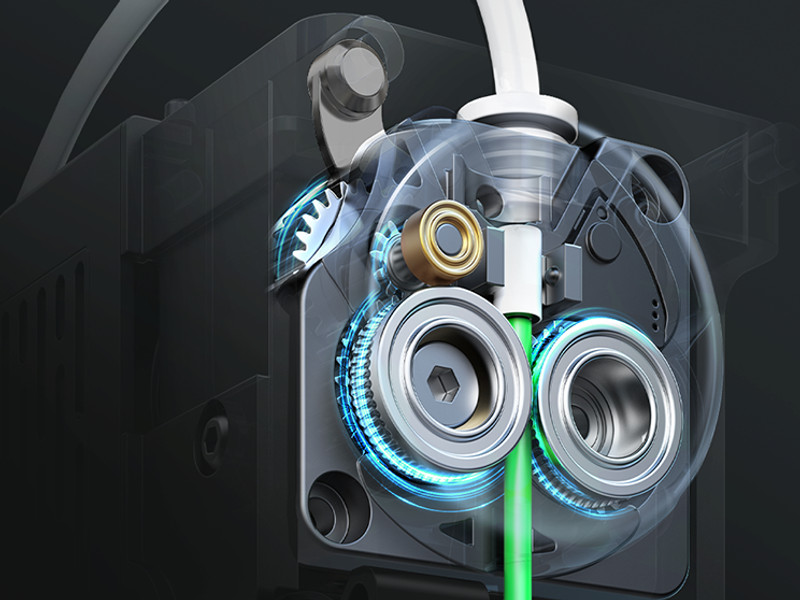
[[Creality’s dual-gear direct drive extruder provides enough extrusion force and speed for high-speed print jobs.]
Auto Leveling
Both the Ender 3 V3 and the Creality K1C use the same types of strain gauges and load cells to perform pre-print bed leveling and automatic Z-offset. The strain gauges create a mesh of the print surface that the machine uses to compensate for any variance in elevation during printing, as the print beds do not have manual height adjustment knobs. You can expect very similar performance as far as first-layer adhesion goes with these two printers, though the textured PEI bed on the Ender 3 V3 does a better job at hiding uneven surfaces than the K1C’s smooth PEI sheet.
Those looking for their very first 3D printer will not be disappointed by the convenience options found on these two machines. Little to no manual leveling should be required from you, regardless of which machine you choose.
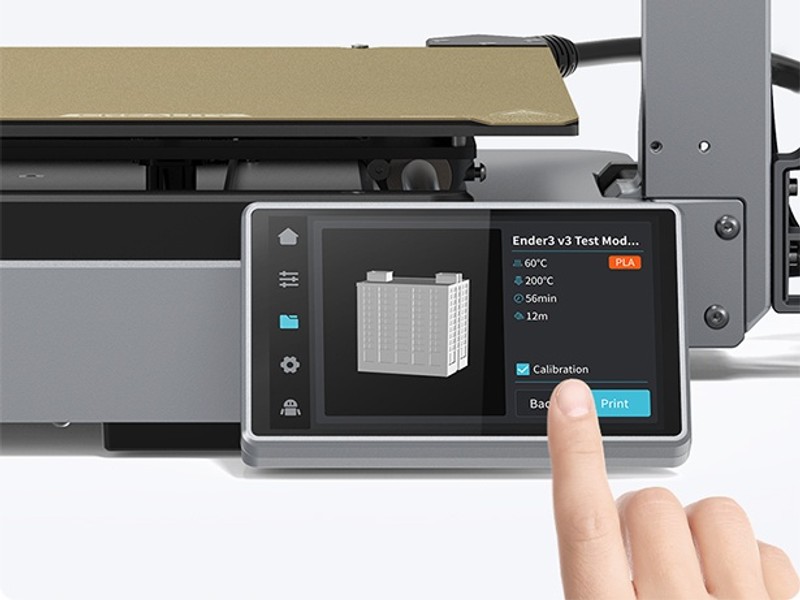
Display and Controls
Both the Ender 3 V3 and the Creality K1C come with a 4.3” full-color touchscreen display that is used to operate the machine. The screen is responsive and the menus are very easy to navigate. The screen on the Ender 3 V3 is upgraded to include high-definition, which is noticeable when compared side-by-side with the K1C screen, though both screens are perfectly useable and you will find the same functionality in both of these displays, aside from this cosmetic improvement.
Touchscreens are a nice addition that makes these 3D printers feel more modern, though they are not a dealbreaker for us. Standard displays with analog scroll wheels still work just fine for the average user.
Firmware
Both of these machines are run off of Creality OS, Creality’s in-house variation of Klipper firmware. It has been designed to work specifically with Creality’s machines, enabling the use of Linear Advance and Input Shaping for improved print quality at higher speeds.
Unlike other companies who use variations on the Klipper firmware, Creality has opted to keep their firmware open-source. This allows the community to make changes and add features to their 3D printers as they see fit.
Connectivity
Both the Ender 3 V3 and the Creality K1C can connect to your local WiFI network, allowing you to use the Creality Cloud app to wirelessly send print jobs to the printers. This type of connectivity is becoming standard for many mid-range 3D printers and is expected on higher-end machines.
Both printers are capable of operating completely offline using a standard USB Type-A thumb drive to store files locally. This is great if you design your own models and want to keep them away from cloud storage.
Should You Buy the Ender 3 V3 or the Creality K1C?
Choosing one of these machines will come down to what you are looking for in your new 3D printer. Both machines will create similar quality prints at similar print speeds. While the more pricey Creality K1C is capable of everything the Ender 3 V3 can do and more, it may end up being overkill for the average user, especially if they plan on only printing PLA, PETG, or TPU where the enclosure is not necessary.
For the majority of users, we recommend the Ender 3 V3 as it suits the needs of the average user and comes in at a much more appealing price point.
If you are looking for a high-speed 3D printer that is capable of printing more demanding materials, such as ASA, polycarbonate, or carbon fiber blends, has an AI camera for print monitoring, or need a machine that comes completely preassembled, then the Creality K1C is well worth the extra ~$160 and will serve you well.
If you are looking to get your very first 3D printer, you can’t go wrong with either of these choices. Both printers come with plenty of smart sensors that will make printing much easier on you while you learn the ins and outs of the hobby. For the cheapest entry point between these two printers, the Ender 3 V3 is a great choice. You may also want to consider the Ender 3 V3 KE, which is even lower cost and has most of the features of the Ender 3 V3.
Click here to view the Creality Ender 3 V3 on Amazon.
Click here to view the Creality K1C on Amazon.
You can find a side-by-side comparison of the specifications for these two printers in the table below: